This post will show you how to obtain an EPP code and Transfer Your Domain Name from the registrar to IT company. You will begin the transfer with the gaining registrar, but there are a few things you can take to ensure the transaction goes well.
Table of Contents
ToggleImportant
- Make sure to finish all four procedures before conducting the transfer to avoid any delays.
- If you move your domain in 45 days of its renewal, you risk losing that renewal year.
- Updating all registrant’s contact information for a generic top-level domain (gTLD) may result in a Change of Registrant procedure, which will necessitate extra verification before the new information is saved.
Get Your Domain Ready
There are certain things you must do before you can Transfer Your Domain Name. To begin, go through the following steps to gain access to your domain settings:
Account Management
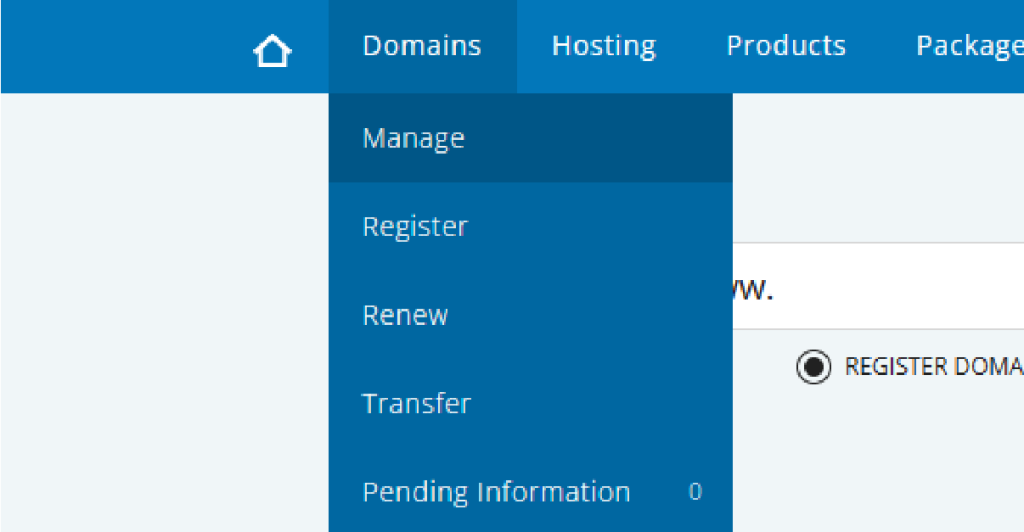
- Log in to your IT Company control panel.
- From the left-hand side menu, select the Domains tab.

Review Contact Information
As mandated by ICANN, your contact information is posted in your domain’s WHOIS record. The acquiring registrar will utilize the information on the domain’s record to email essential information about the transfer to the administrative contact, so be sure it’s right. It’s preferable to avoid using an email address linked with the domain and instead use a public email provider like Gmail.
You will only have the option to opt out of the 60-day transfer lock if saving your changes would result in a Change of Registrant request. If the option is not available, the Change of Registrant process (steps 7, 9, and 10) will not apply.
Consider the following before preserving changed registrant contact information to Transfer Your Domain Name:
- Domains that have been registered, renewed, or transferred within the last 60 days cannot be transferred.
- As required by ICANN, domains cannot be moved within 60 days of the new registration, renewal, or prior transfer.
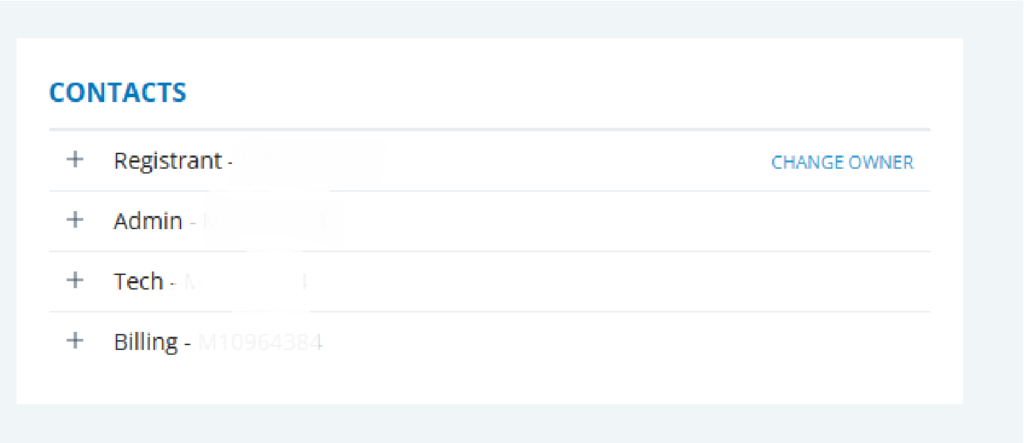
To update the contact information for your domain, do the following steps:
- Click the Domain tab.
- You can view and edit each individually, depending on which tab you click on (Owner, Admin, Tech)

- Select the contact you wish to update to, and SAVE changes.
Note: If you need to enter new contact information, first select the enter a new domain contact link under Domain Contacts before making improvements to your contact information.
- Locate the verification email and click the link to approve the changes.
Name Servers should be Updated
You may register your domain with one business and host your website with another, so you can keep hosting your website here if you choose. However, if you’ve already transferred your website files to a new host, you should change your name servers now to avoid downtime during the transfer. Because you are unable to make DNS changes when the transfer is in execution, you must do it immediately.
Dreamscape
- Click the Manage Domains tab.
- Scroll all the way down to Name Servers.

- Enter the settings for your new hosting provider.
- Click the SAVE button.
When you save your modifications, your new DNS settings will begin to spread. Each ISP updates at a different rate, with most upgrades taking 24 – 72 hours to finish globally. During this period, your emails will be unavailable, and web traffic will be routed to either the old or new server, depending on the visitor’s ISP.
Domain Unlocking
Domains are automatically locked to prevent unwanted transfers. Before you can Transfer Your Domain Name to a different registrar, you must first unlock it.
Dreamscape
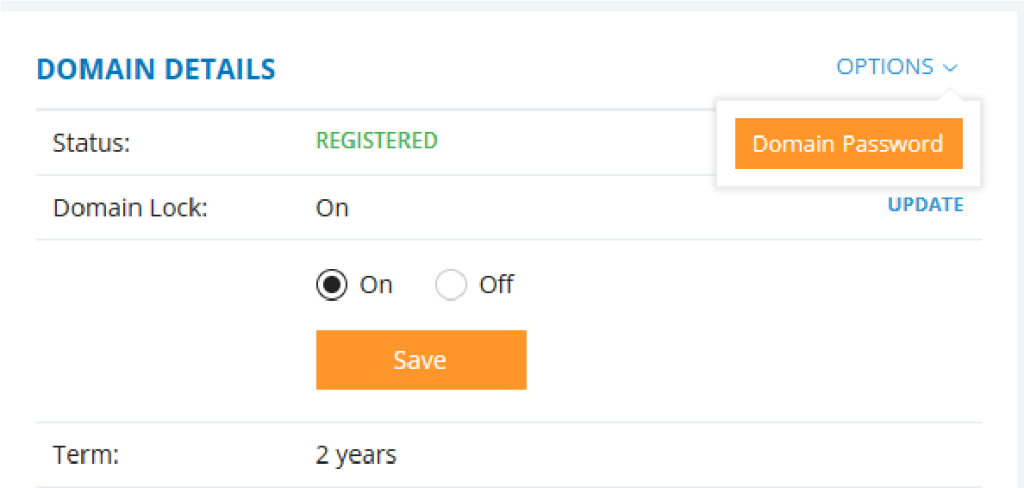
- Click the Domain Lock section.
- Click the Off Domain Locked toggle
Obtaining the EPP Code
The EPP code, sometimes known as the Authorization or Auth code by different registrars, is required next. It is effectively a unique password for the domain, made up of letters, digits, and special characters, that you will provide to the acquiring registrar to allow to Transfer Your Domain Name.
Dreamscape
- Click on the Options in Domain Details.
- To obtain an authorization (EPP) code, click the Domain Password button.
- You will be sent to a screen where you must confirm that you accept transfer terms before clicking the CONTINUE TRANSFER button.

Begin the Domain Transfer Process
Your Process to Transfer Your Domain Name is Started. The transfer itself will be conducted with the acquiring registrar, therefore you’ll be required to contact them for exact instructions, but here’s a broad idea of what you’ll be required to do:
- Log in to your account with the gaining registrar.
- Begin the domain transfer process according to their instructions.
- Please provide them with the EPP code you copied from the Transfer EPP tab.
- Follow any additional steps and/or validation they require.
Conclusion
Finally, Transfer Your Domain Name to our IT Company is a simple process that guarantees an ideal transition. You establish the way for a successful transfer by following the procedures provided, from getting the EPP code to upgrading name servers and unlocking your domain. Remember to carefully handle contact information and to consider the 60-day transfer lock consequences. With these protections in place, your domain transfer process with our IT Company will be simple and quick.