WordPress is a popular open-source content management system (CMS) that is both versatile and simple to use. There are several methods for learning how to install WordPress, ranging from utilizing a Web Hosting Company installer to manually using an FTP client.
This beginner-friendly tutorial includes step-by-step directions for installing WordPress CMS without any technical skills. We will also discuss some typical difficulties that you may experience and how to resolve them.
It is easy to install WordPress on Ubuntu, a popular VPS operating system. However, this installation guide will mostly cover shared hosting.
Table of Contents
ToggleWhich WordPress Installation Method Is Most Suitable for You?
Each method suits different needs and levels of technical knowledge. Check out the table below to see which one is right for you.
| Installation Method | Best for |
| With Softaculous | Those using DirectAdmin, InterWorx, and H-Sphere |
| Manually by Company | Users that are technically savvyThose who want greater control and flexibility over their installation. Those who wish to use an earlier version of WordPress |
How to Install WordPress Using Softaculous
In this article, we will utilize DirectAdmin:
- Access your account by logging into your web hosting account.
- Navigate to Softaculous Apps Installer and choose WordPress.

- Find and select the WordPress Install Now option.
- Fill up your WordPress Site Name, Site Description, Admin Username, Password, Email, and select your chosen language.

- This form also provides additional options to help get your WordPress site started:
- Select Plugin(s) including the Limit Login Attempts, Classic Editor, and Install LiteSpeed Cache plugins.
- You should also install a WordPress theme for your site here. To find it in the directory, click Show All Themes
- Fill complete the Email installation details to the box to acquire all of your installation specifics.
- Once you finish filling out the form, click Install.
Click the WP Admin icon under Current Installations to open the installed WordPress Admin.

How to Install WordPress Manually
It is possible to manually install WordPress if the preceding choices do not work, the Web Hosting Company offers an Auto Installer tool, or you simply want to do it yourself.
This option requires you to manually upload WordPress to your hosting account. especially though it is a lengthier procedure, it is simple to follow, especially for novices.
1. Setup WordPress Installation
Before we begin to install WordPress manually, let’s set up a few things first:
- Check that your hosting plan satisfies the WordPress system requirements:
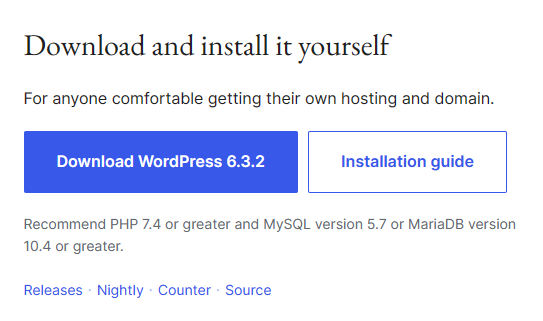
- PHP 7.4+, MySQL 5.7+, or MariaDB 10.3+ are required.
- HTTPS compatibility
- Make sure your hosting plan meets the WordPress system requirements:
- Download WordPress from the WordPress.org official page. Make sure to get the most recent version and extract it from the ZIP file.

- Upload your website files from the extracted WordPress folder to your public_html file with Hostinger’s File Manager or an FTP client like as FileZilla.
- If you’re using an FTP client, go to your web hosting account and look for the Create a New FTP Account option.

2. Create MySQL Database and User
To begin with the manual installation of WordPress, we must first generate new MySQL credentials:
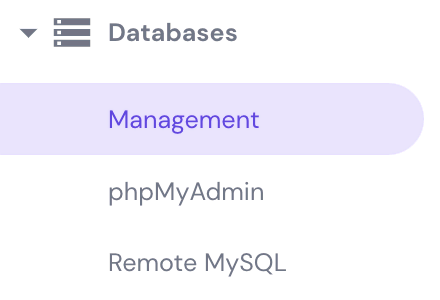
- Log in and navigate to the Databases area, then to Management.
- Make a new MySQL database with a new name, username, and password. After entering all of the required information, click the Create button.

Pro Tip
Make a duplicate of the MySQL credentials, including the alphanumeric string, since you will need them later.
3. Configure wp-config.php
wp-config.php is a file that tells WordPress about your database server settings. It is custom-made for you. To customize your WordPress files, follow the steps below:
- Right-click on it, and select the Edit button.
- Once open, look for the information that says:

- Replace database_name_here, username_here, and password_here with your already generated MySQL credentials. Don’t forget to add the alphanumeric strings.
- When you’ve finished editing, click the Save & Close button.
4. Run WordPress Installation Script
To install WordPress script, open a browser and enter your domain name to install WordPress manually. You may also accomplish this by visiting yourdomain.tld/wp-admin/install.php. This will bring up the WordPress configuration page:
- WordPress will initially prompt you to choose a language for your site. Do so, then click Continue.

- Fill in your website and administrator information:
- For your WordPress site, create a new Site Title.
- Set the WordPress Username, Password, and Email Address, which will be needed to access the WordPress Admin Dashboard later.
- Simply uncheck the box next to Search engine visibility if you do not want the website to be seen in search engines.
- Click the Install WordPress button to finalize the process.

- Then, to obtain access to WordPress Admin, enter your login information and click the Login button.

WordPress may require your MySQL credentials when you select a language. Click Let’s Go! because you already have them.
- Enter the MySQL database credentials. Leave the Database Host and Table Prefix fields alone. Only change them if you wish to run several installs from a single database. After filling out all of the required fields, click Submit.
- WordPress will assess if it can connect to the MySQL database you created. Select If there are no issues, proceed with the installation.
Common WordPress Installation Problems
As you work through this installation guide, you may run across problems with the WordPress installation process. The following are some of the most common issues encountered when installing WordPress.
Directory Listing Instead of a Web Page
Instead of usual pages, visitors to your site will see a list of files and folders. This issue happens when a web server does not see the index.php file. As a result, the site becomes vulnerable to cyberattacks.
To fix this, go to the DirectAdmin Dashboard Advanced Folder Index Manager and disable the directory listing.
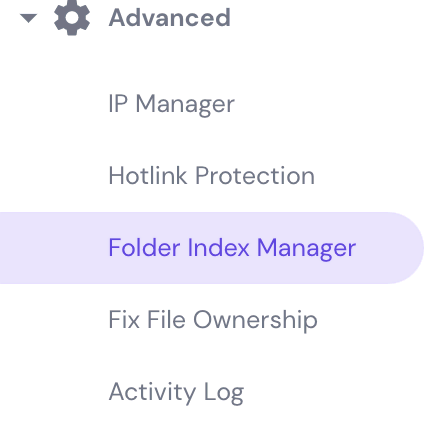
Then, under Choose a new indexing type, choose No index next to public_html.
Another option is to upload an index.php file to the public_html folder using your File Manager.
Headers Already Sent Error
This issue occurs as a result of introducing a syntax error while altering the wp-config.php file.
To resolve this issue, first download the wp-config.php file afresh. Check that the first line is?php and the last line is?> with nothing after it in a text editor. Reload the page after saving the file and re-uploading it.
WordPress Site Page Looks Like Gibberish
If your page’s source code is littered with?php?> tags, your PHP isn’t operating properly.
To resolve this problem, ensure that PHP is properly installed and that no errors occur during the configuration process. Go to PHP Configurations PHP Options and disable zlib.output_compression.
If the issues persist, contact your web host’s customer care staff for assistance.
Error Connecting to Database
If an issue occurs when connecting to the database, it implies your site was unable to get the information required to render the page.
To resolve this issue, check the login credentials in wp-config.php to ensure they match your MySQL credentials.
If you’re certain you’ve provided the right database details, you may try resetting your MySQL password. Navigate to Databases Management, click the three dots symbol, and then select Change Password.
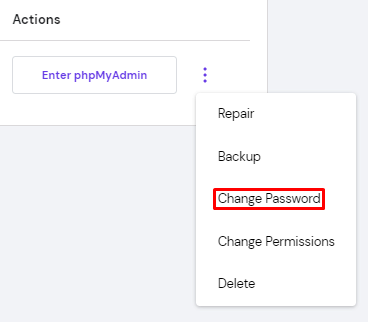
If none of the techniques above work, create a new database and user on MySQL Databases.
Conclusion
Finally, selecting a reputable Web Hosting Company is the first step in ensuring a smooth and effective WordPress installation. It serves as the cornerstone for your internet presence. As we’ve seen throughout this article, the correct hosting provider simplifies the installation process, provides assistance, and provides the infrastructure required to operate WordPress successfully.
At IT Company, we provide high-quality Web Hosting Company services that make WordPress installation and administration a breeze. Our committed support team is available to help you at every step of the way. So, whether you’re a seasoned WordPress user or just starting out, you can rest certain that you’re in good hands.