
DKIM is an additional authentication mechanism that aids in confirming the legitimacy of email received from your Microsoft Office 365 account. This, in conjunction with SPF and DMARC, keeps attackers from impersonating your emails.
DKIM should be configured if SPF is necessary to send emails from Office 365. If you have more than one custom domains in Office 365, you must setup DKIM since the integrated DKIM Configuration in Microsoft Office 365 is inadequate.
In this tutorial, we’ll establish DKIM in Office 365 and upload the necessary entries to our DNS Hosting provider.
Setup DKIM for Microsoft Office 365
If you just have one custom domain, establishing DKIM is not necessary. If you do not enable it manually, Microsoft 365 utilizes the standard policy and 2048-bit public DKIM key for your domain.
However, if you have an additional custom domain or want to establish DMARC (recommended), you have to manually configure DKIM in Office 365.
To configure DKIM, we require access for the DNS records. Remember that it may take some time for the DNS changes to be processed.
1. Make DKIM keys
First, we will generate DKIM keys via the Microsoft 365 security center. Despite the fact that they have a similar format, this will render copying and pasting the right DNS record information easier.
If you don’t see the option to Create DKIM Keys, simply proceed to the next step.
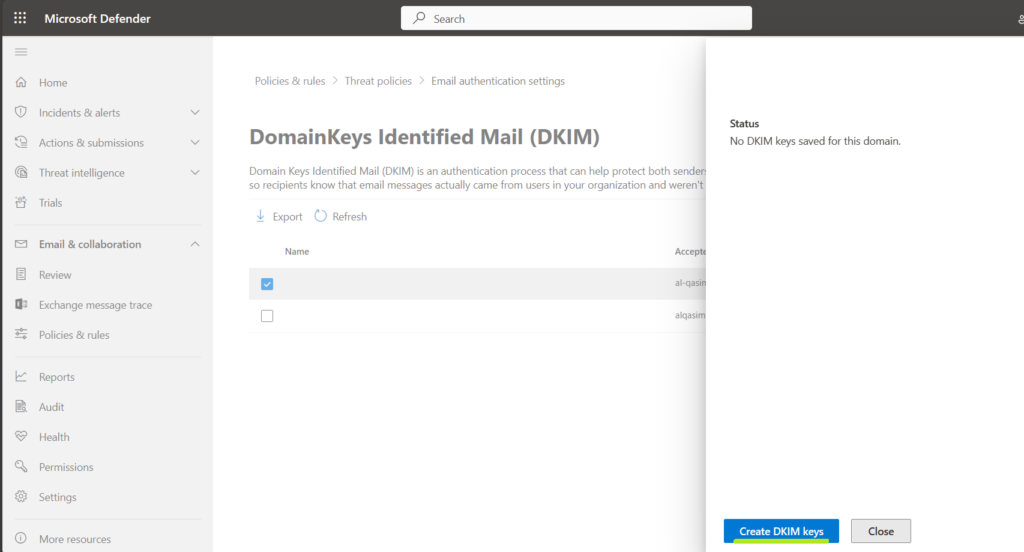
- Visit security.microsoft.com/dkimv2 and sign in.
- Choose the domain from which you are sending email, and then click Create DKIM Keys.
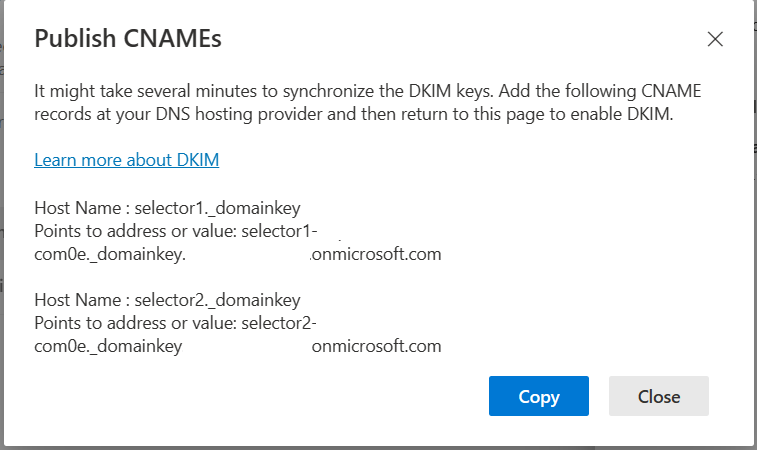
2. Copy or note down the keys
The DKIM Keys all follow the same format. You may replace contoso-com with the name of your domain and example.microsoft.com with our example.microsoft.com domain in the example below.
Value: selector1._domainkey.example.onmicrosoft.com
3. Log in to your DNS hosting provider’s website
We can now build the necessary DNS records.
- Access your DNS hosting provider’s website.
- Go to your DNS records administration page.
4. Make the DKIM records
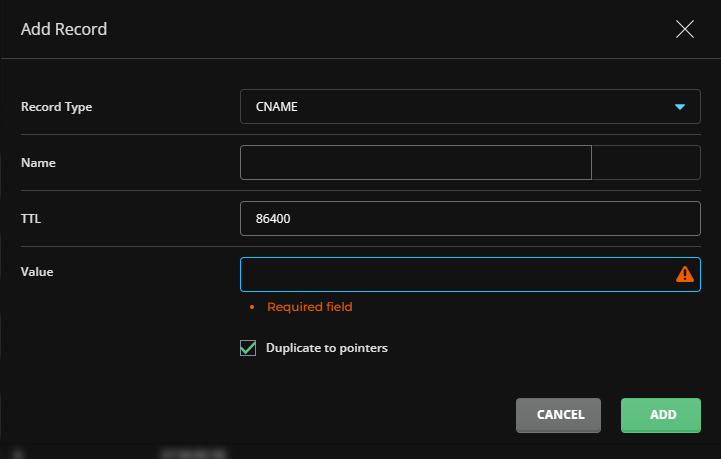
We’ll need to set up the two CNAME entries.
- Create a new DNS Record
- Choose a type: CNAME
- Enter the DKIM key’s name and value.
Repeat for the additional DKIM record (simply replace the 1 with a 2).
5. Enable DKIM
According to your DNS hosting provider, we may now have to wait a few minutes or perhaps a day.
Return to the Security Admin Panel and turn on DKIM for your domain.
- Decide on a domain.
- Set the option to “Sign messages for this website with DKIM signatures”
If you receive an error stating that the CNAME records could not be discovered, simply wait a little longer. It should function after 24 hours. If the problem persists, double-check the CNAME record’s name and value.
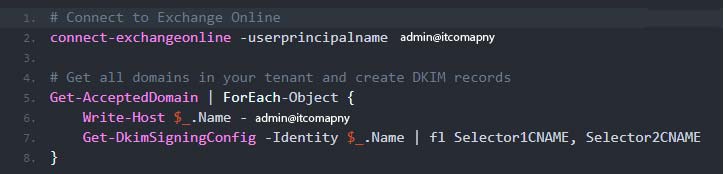
Using PowerShell to generate and activate DKIM
When you need to implement DKIM for numerous domains in your tenancy, PowerShell might be handy. We can build DKIM records for all domains in your tenancy using PowerShell and enable DKIM once you have produced the CNAME records.
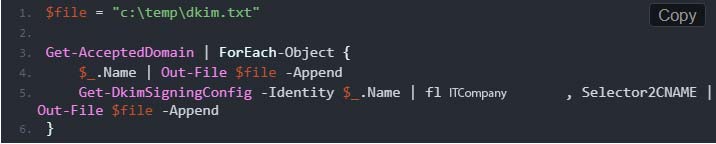
You may also save it as a file:
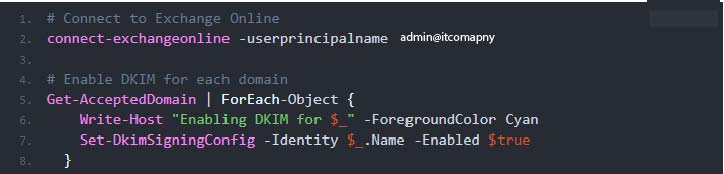
The next step is to generate the CNAME records. After you’ve done that and waited the necessary length of time, you can use the PowerShell script below to activate DKIM in Office 365:
Wrapping Up
Finally, DKIM is an important layer of email authentication inside Microsoft Office 365, combining SPF and DMARC to protect against email impersonation. While DKIM isn’t required for a single custom domain in Office 365.
DKIM setup entails creating keys using the Microsoft 365 security center, copying the keys in a certain format, and establishing DNS records with the hosting provider. It usually takes some time for DNS updates to propagate.
You may strengthen your email security by following the procedures mentioned: establishing DKIM keys, adding CNAME entries to the DNS, and activating DKIM in the Security Admin Panel.
DKIM not only strengthens your email security, but it also increases confidence and dependability in emails sent from your Office 365 domain.