Migrating your website to a new Web Hosting Company does not have to be a tough effort if you use the appropriate strategy. This involves tasks like downloading backups and transferring them to the new server, as well as directing your domain name.
One of the Methods to transfer your Website is do it Manually, However Another option is to request transfer help from the new web host. If accessible, we recommend using this route because it is the most convenient option for novices with minimum technical skills.
In this post, we’ll show you how to move website to another Web Hosting Company.
How to Transfer Website to a New Web Hosting Company:
Follow these six steps to manually migrate your website to a new hosting provider:
- Purchase a new hosting account.
- Downloading backup files
- Downloading website database files
- Transfer the files and the database to your new hosting account.
- Change the name of your domain to the new server.
- Examine your website before it goes online.
1. Purchase New Hosting
Before migrating a website to a new hosting provider, you must first select a new web host. To make the transfer procedure easier, look for a hosting company that provides a free site migration service.
Also, keep in mind that the new web host has a long-term influence on your hosting experience, not only when you migrate. It is consequently critical to consider these long-term consequences before making a final decision.
Here are a few important factors to consider when selecting a Web Hosting Company:
- Dependable performance: Select a web host that ensures good uptime and does routine maintenance.
- Website-creation software: Whether you use a content management system (CMS) like WordPress or created the website from scratch, choose a new web server that supports many platforms.
- User encounter: Look for a new web host that provides an excellent user experience, such as IT Company’s DirectAdmin, with an easy interface and well-designed features.
- Excellent value for money: Make careful to consider a hosting provider’s initial and long-term charges. Look for one that provides adjustable plans at various price points so you may discover one that fits your budget.
Types of Web Hosting Company Plans:
- Several sites share a single server and its resources under shared hosting. It’s an excellent choice for novices who have modest websites with low visitor counts. Your web host manages server monitoring, upgrades, and backups when you use shared hosting. IT Company provides three shared hosting plans: Single, Premium, and Business Shared Hosting.
- A website using VPS hosting receives dedicated resources from a virtual partition of a real server. It’s a fantastic choice for medium to big websites that require performance stability and resource flexibility. At IT Company, you can buy a VPS at several pricing ranges. The highest-tiered plans include additional features and resources.
- A website hosted in the cloud is one that runs on several virtual or cloud servers rather than just one physical server. Because cloud hosting ensures excellent website availability, it is suitable for busy websites with large traffic levels.We provide three cloud hosting options at IT Company: Standard, Business, Premium.
- Managed WordPress hosting is designed exclusively for sites developed with this CMS, and it provides specialized servers and resources to help WordPress sites run smoothly. Many subscriptions additionally include pre-installed plugins and themes for WordPress.
2. Backup Files for Your Website
The first step in manually transferring hosting is to backup your complete site and preserve your website data. The aim is to get it working on the new hosting account without any issues or missing pieces.
This guarantees that your website’s content, plugins, and themes stay unchanged when it goes live on the new hosting account.
Make a backup of your files
Manually Backup Your Website Files
If your current hosting company does not provide an easy backup tool, you will need to backup your website manually.
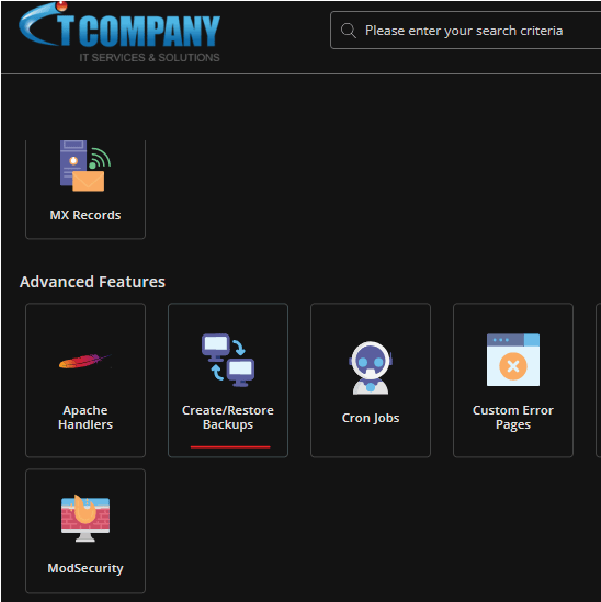

You will now be able to locate the Website Backup on your computer’s desktop, which contains the downloaded website files.
3. Download Your Database Backups
Your website’s database is just as crucial as its files. We’ll go over two techniques for backing up and downloading your database: manually.
Back Up Your Database Manually
You will need access to your site’s phpMyAdmin, which can be located in the control panel of your former hosting account, to complete this step.
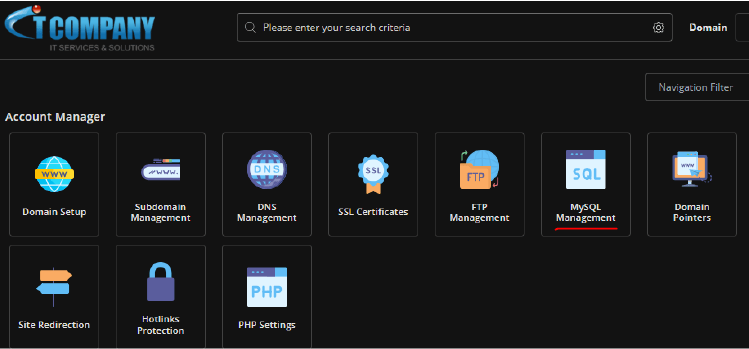
- Access your DirectAdmin, then go to MySQL Management→ phpMyAdmin.
2. Locate your site database in the List of Current Databases and click Enter phpMyAdmin.
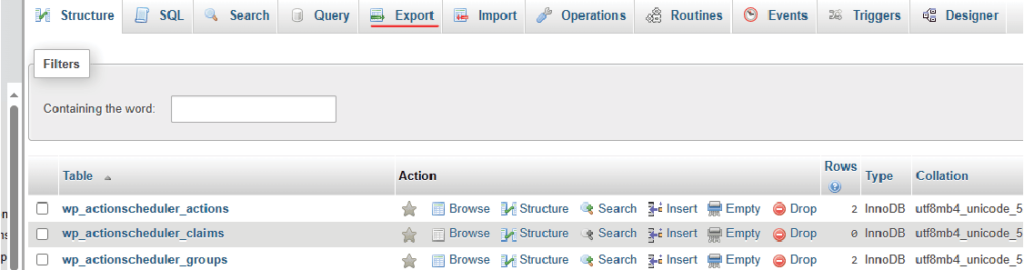
3. The phpMyAdmin interface will be shown. Select all of the files that comprise your website’s database, then click Export.
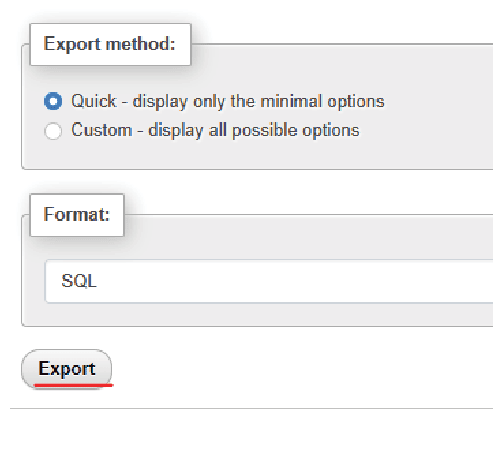
4. Select Quick as the Export method and SQL from the Format drop-down selection.
4. Move the Database to the New Web Hosting Company
The following step is to manually move the files and database of your website to the new provider.
- Return to Databases and choose phpMyAdmin. Locate your freshly created database and press the Enter phpMyAdmin button.
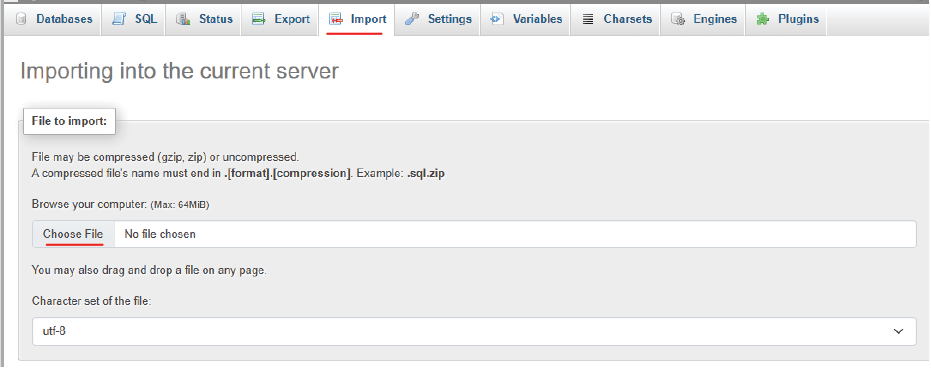
- On the phpMyAdmin page, click the Import tab located at the top of the page.
- Click Choose File and choose the unzipped database files from your website to upload.
If you are migrating a WordPress site, you must change wp-config.php with your new database information. The following information is available in the root directory of your web hosting account:

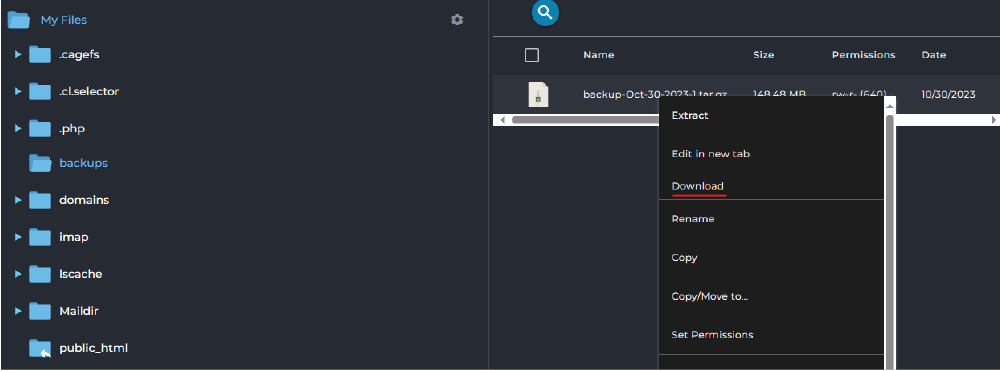
- On DirectAdmin, navigate to Files → File Manager.
- Navigate to the public_html folder, right-click the wp-config.php file, and choose Edit.
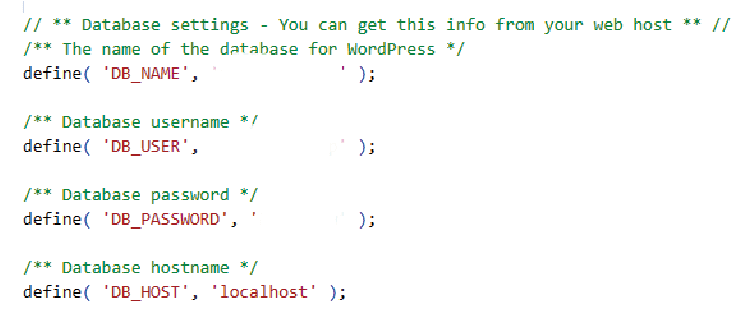
- Add your new database details in these lines of code:
- DB_NAME – database name.
- DB_USER – admin username.
- DB_PASSWORD – admin password.
- DB_HOST is the database hostname. This is typically localhost, however it may differ depending on the hosting provider.
5. Direct Your Domain to the New Server
Let’s go over what we’ve done so far. You’ve switched hosts and moved your website’s files and database to a new account. You may also visit the control panel for your new hosting account.
You’ve arrived at the final stage of your hosting transfer: directing your site’s domain name to the new server. You must adjust your Domain Name System (DNS) settings to accomplish this. If you want to change your domain name, you may buy a new one, but it’s usually a good idea to keep the old one active as well.
When transferring web hosting, this is an essential step. Visitors will be unable to access your website unless you link the domain to the new server.
Simply said, DNS converts the domain names of websites into IP addresses. The DNS record for a website simply offers instructions to web browsers and tells them where to go to load web pages.
6. Testing and Evaluation
Before launching your website after switching web hosts, you should run certain tests to check everything is working properly.
In this part, we will assume that you have successfully performed all of the preceding procedures and that your site’s domain is pointing to the new web host’s nameservers.
Examine your site to ensure that both the front and back ends function properly. This also helps to prevent website downtime and uncover faults before the site goes online.
Navigate and explore the various aspects of your hosting dashboard to get a feel for your new control panel. Check that all of the parameters are adjusted to the specs of your website.
Browse all of your website’s pages from the front end. Check that all material, including photos, text, and videos, loads properly and accurately. Also, ensure that all features, such as contact forms, function correctly.
If there are no issues, the manual hosting transfer procedure is complete. Congratulations!
Summary of Transferring Website to New Web Hosting Company
Moving your website to a new Web Hosting Company can be easily accomplished using various methods, as identified in this article.
Options include managing the migration independently, procuring a migration service from the new server, or leveraging a WordPress plugin.
Opting for the latter and entrusting the task to the new hosting company emerges as the most straightforward method for transferring web hosting. When seeking a new host, prioritize providers that offer comprehensive site migration services.